Friday, May 14, 2010

Jointing Fence

Squaring board edges is one of the typical tasks where traditional woodworking hand planes truly show their effectiveness. Stanley produced the famous—but rare—No. 386 fence attachment to be mounted on the side of jointer planes.

Of course, the best modern plane makers offer similar solutions. I recently needed to square the edges of long fir boards and chose to use the new Stanley No. 62—a low-angle plane with the length of a jack plane, modeled after the historical No. 62. While it’s not a jointer, the low-angle configuration provides advantages when planing softwoods. However, its very low sides don’t allow for attaching traditional guides, so I had to create a custom solution.

I built a simple guide using a beech board, composed of several laminated pieces for greater stability. The top part of the guide is shaped to match the plane, while the bottom extends about 7 cm below the sole.

A second removable piece, attached to the main guide, covers the outer edge near the plane’s mouth. This ensures that when the guide is aligned with the workpiece, it remains within the cutting area. In special cases, this piece can be replaced with a custom-shaped insert to set a different angle from 90°.

The anchoring system consists of two L-plates with a central pivot, forming a very effective third-class lever. Rubber pads between the plates and the plane ensure a secure grip.

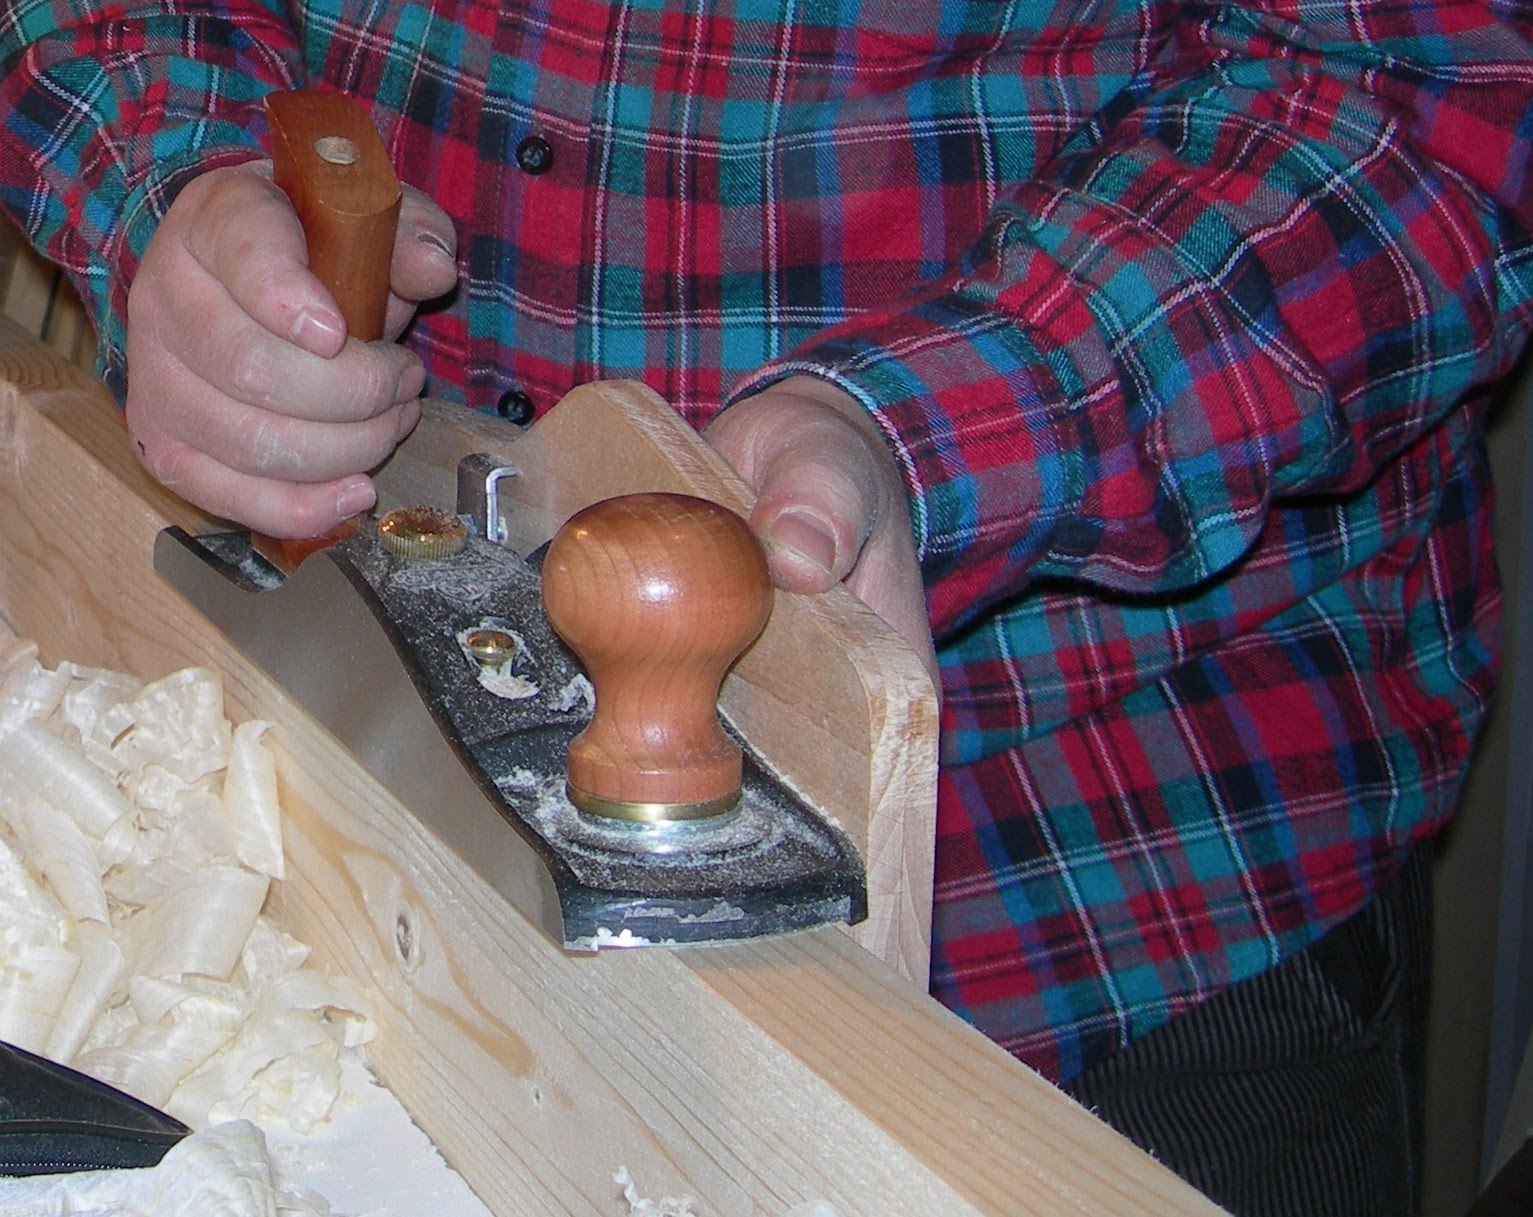
During use, lateral pressure holds the fence tightly against the board, maintaining stability and accuracy throughout the cut.


Saturday, May 1, 2010

Sticking Board


When working with small-section pieces using molding, plow, or rebate planes, it can be helpful to use a dedicated planing board to keep the workpiece steady. This setup consists of a leveled board, at least 150 cm long, with a cross-section of about 10 × 2.5 cm. A straight rail (about 4 × 2.5 cm in section) can be glued on top.

It’s important that the side of the rail is square to the surface that supports the workpiece. I added some screws at the end of the board to act as stops during planing. These can be tightened or loosened as needed to prevent the piece from slipping.

If the piece is square, that alone may be sufficient. However, it's often more convenient to work with stock longer than the final dimension, so you can secure it using parts that will later be discarded (as in the cheek of a tenon shown in the photo). Thin nails can be used to hold the piece firmly in place. The board itself is secured using bench dogs and a side vise.

Saturday, March 6, 2010

Plow Plane Blade Sharpening

After years of woodworking by hand and using hand tools, I’ve realized that the variety of blades requiring sharpening is so broad that relying on a single guide is impractical. In short, there’s no such thing as a universal guide! So, I’ve acquired several different devices that allow me to securely hold most blades during sharpening. For plow plane blades, I prefer the Stanley guide. Its rear support compensates for the narrow width of the cutting edge, preventing the device from tilting to one side and ensuring a perfectly square edge—which is essential for this type of blade."

"However, the Stanley guide was originally designed for chisels or wider blades. Metal plow blades are thin, making it difficult to tighten them securely. To solve this problem, I place a small wedge between the blade and the lower part of the guide. This provides a firm grip without compromising the stability of the setup during sharpening.

Wednesday, February 24, 2010

Twin rabbet planes


I made these two rabbet planes by replicating a larger 17th-century example. Their main characteristic is that each has only one open side. For the blades, I used files, properly shaped and sharpened. The bodies are made of mahogany, with wenge soles. The metal bar on the side prevents the body from flexing when the wedge is tightened and adds weight to the plane. You could avoid using the bar by either increasing the thickness of the plane body or reducing the blade width, but both would be uncomfortable compromises."

"The hole for chip ejection can easily be made with a Forstner bit. The body design is very close to the original, and I must say, the finger support is perfect."

"Since each plane only works in one direction, you need to make two twin planes—one for each direction. One use I’ve found particularly convenient is finishing rabbets. In one instance, after cutting a rabbet with a circular saw, the blade setting was off and left a visible step. That was an easy job for one of the little twins!


Sunday, February 21, 2010

Tool Chest Bench


There are two important benefits to accommodate a good number of tools in the carpenter's bench: they are always on hand and, adding a consistent weight to the entire structure, greatly enhance stability. On my bench I obtained the most space possible: in addition to the classic dresser, I used the open compartment under the top to accommodate the wooden planes I use more frequently. In the shorter side where the vice is not present there is another space, built in the thickness of the legs and when I fixed some instruments for measuring and tracking.

Of course, the planes are king, occupying most of the available space. The two large drawers on the left side are occupied by combination planes. One of the drawers on the right side is devoted to tools for drilling, brace, hand drill, gimlet, tips etc..